Nowadays, every company has a website contact form on their website to collect information on their visitors.
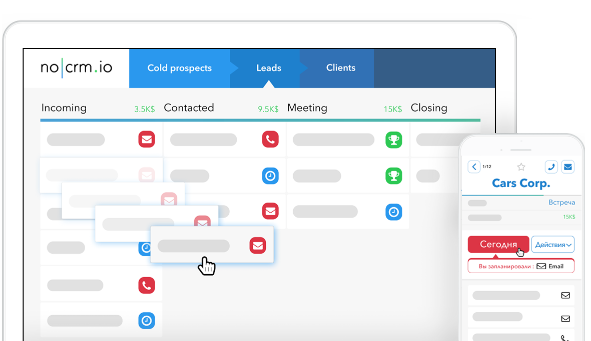
When visitors do fill out the contact form, it’s a sign that they are interested in what you sell and you need to treat them as warm leads inside your lead management tool.
You will then need to create those new opportunities in your sales tool. But doing it by hand makes your salespeople lose too much precious time…
This is why we have created the contact form integration, available in all noCRM editions, that allows you to create new leads automatically in your pipeline.
How to integrate a website contact form with noCRM?
To integrate your contact form(s) with your noCRM account, you will need an element that is unique to your account: your xxxx@add.nocrm.io e-mail address. The ‘xxxx’ needs to be replaced by the name of your noCRM account.
Example: if your URL to access noCRM is ‘my-company.nocrm.io’, then your e-mail will be ‘my-company@add.nocrm.io’.
You can find your unique e-mail address in the Admin Panel, under ‘Integrations’ > ‘Built in tools’ > ‘Contact form’.
More information can also be found in our Help Center, here.
Advanced integration options 👀
In case you need those leads to be assigned to a specific user straight away, to have specific tags added automatically, or even to enter a specific pipeline you’ll need to follow the instructions below.
1. Have the new lead automatically assigned to a user
In order for the new incoming lead to be assigned automatically to an existing user, you will have two options: the user can add the e-mail the leads are coming from as an alias of their noCRM account, or you can add a hidden field to your contact form that looks like this:
‘#user: name@company.com’.
Example: My Company has a user called Mary, and all leads coming from their website need to be assigned to Mary. Mary’s e-mail address is mary@my-company.com. The hidden field will be #user: mary@my-company.com.
2. Add tags to the new created lead automatically
- In order for the new leads to be created with tags, or to enter a specific pipeline, you’ll have to create hidden fields in your contact form(s).
Example: if you want to add the tag ‘website’ to the leads in order to have the information of where these leads are coming from, you’ll need to create a hidden field that looks like this: #tags: website. To have more than one tag added, use the same hidden field and separate the tags by commas: #tags: website, Spanish, Spain.
- For the lead to enter a specific step of the pipeline, use #step: name of the step. Example: #step: To Qualify (if you have a step called To Qualify)
Example: #step: To Qualify (if you have a step called To Qualify)
For more detailed information on all the possible ‘hacks’, please read this Help Center entry.
You can also have a look at our other articles to discover how to make more sales calls in less time or easily create cold call sales scripts.
