


Assign an incoming lead fulfilling a condition to a sales rep
Becoming a better salesperson


This workflow aims to assign new unassigned leads to a user of your choice should they meet a pre-set condition. In this example, the condition is if the lead has the tag "Europe". The goal of this workflow is to help you understand how to add specific logic to a scenario.
When an unassigned lead comes into your noCRM account from external sources, tagged with a word of your choice, you might want to have it automatically assigned to a specific user, so they start working on it.
As an example, we're going to do this using four different methods using no-code:
- Method one: Apply a filter condition when assigning leads to sales reps using Zapier
- Method two: Apply a filter condition when assigning leads to users using Make
Note: The simplified API methods follow the same steps as those of Zapier and Make.
Method one: Apply a filter condition when assigning leads to sales reps using Zapier
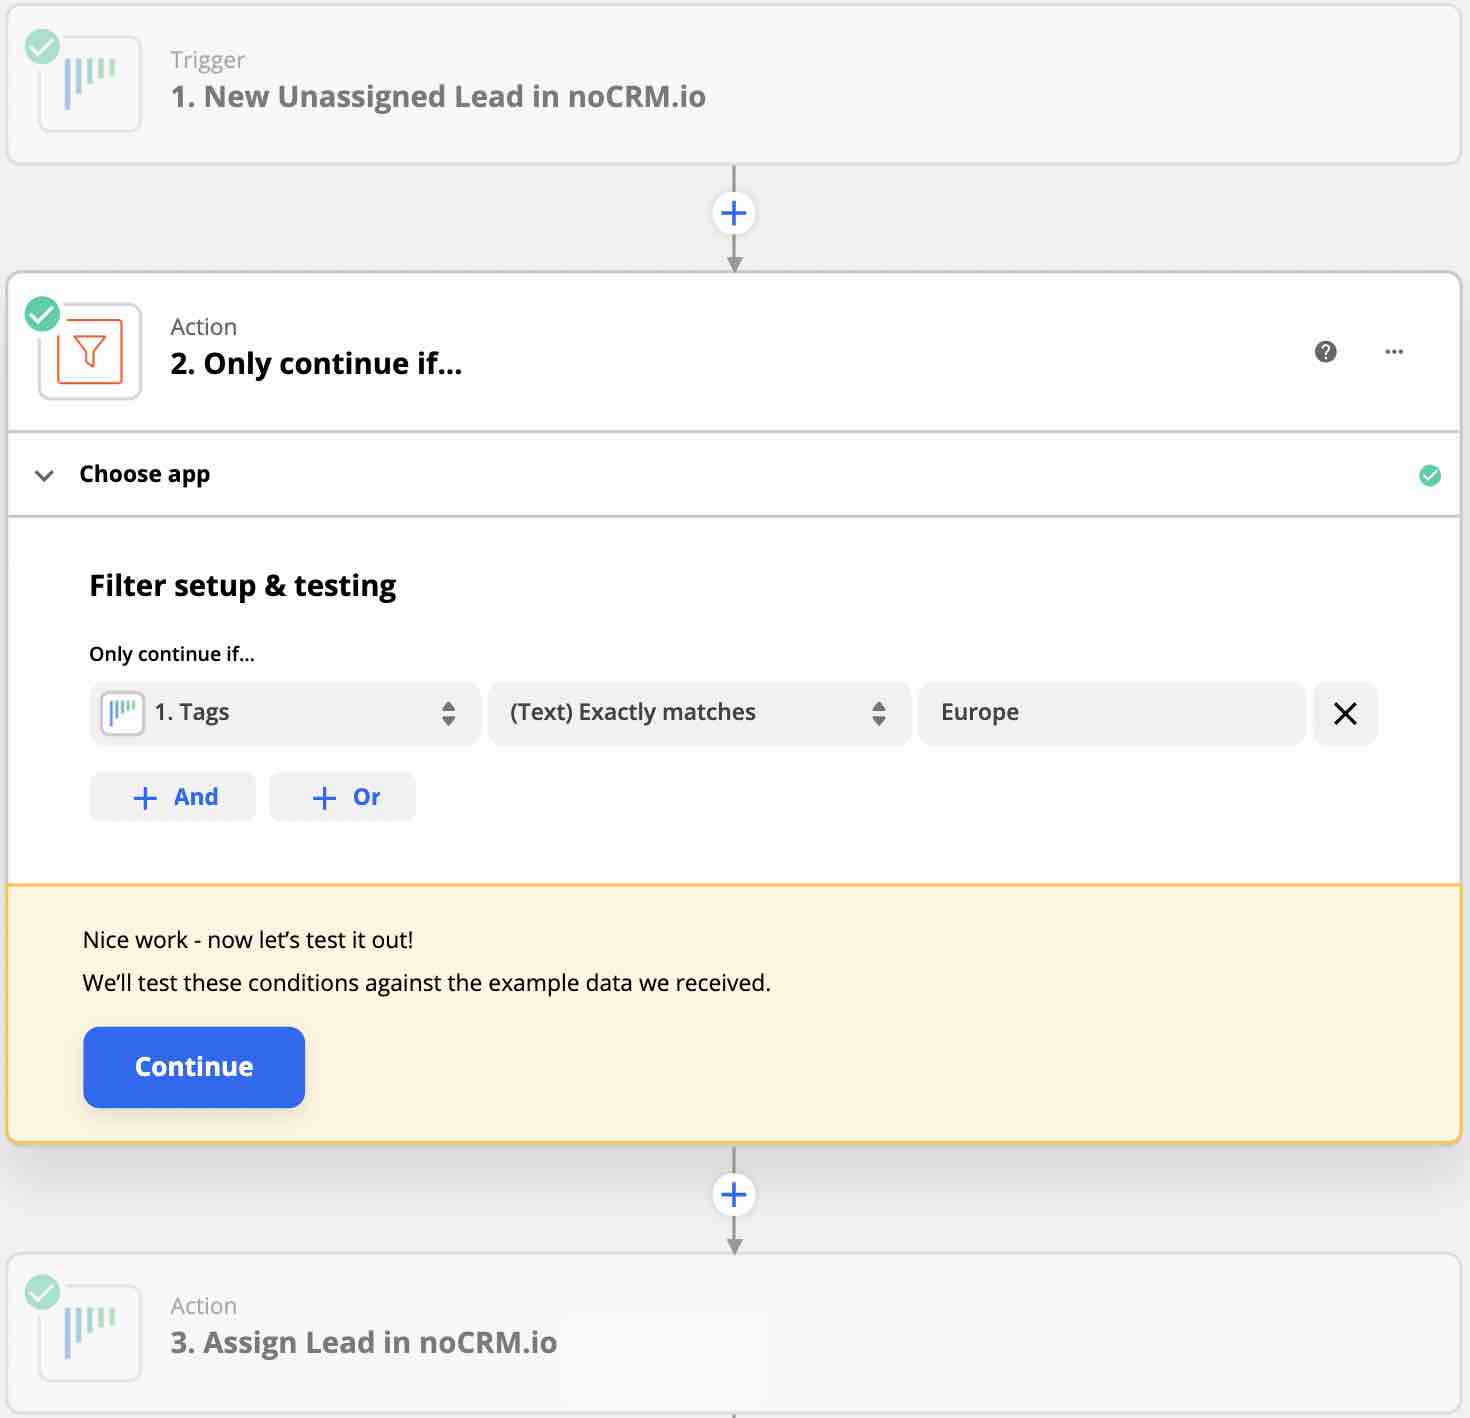
Following Automation tutorial No. 1, the first Zapier method, we need to add the filter step to the workflow.
Between the first and second action is a plus (+) icon. Click on it and select Filter by Zapier as the app. This ensures that the workflow only proceeds if it meets your condition.

Choose "Only continue if..." as your Action event.
Next up is to set up that filter. In this case, we're choosing the condition as a specific tag.
Select "Tags" from noCRM's first step, Text (Exactly matches), and type in what the tag is, "Europe".
Following the "When this happens, then do this" concept, the action "Assign lead" has been set up; all you need to do is try it and Make a Zap!.
Method two: Apply a filter condition when assigning leads to users using Make
Now let's do the same thing but with Make.
After completing the steps from Automation tutorial No. 1, the first Make method, we'll add the conditioning layer.
As a reminder, the condition in this example is to assign a lead with the tag "Europe" to the user of your choice.
Click on the connecting line between the two models. This will bring up the filter panel. Name the filter under "Label," and add the condition "Tags []" to equal "Europe".

Run the scenario to test it and turn it on in the Scheduling section on the bottom.
Now that we've successfully added a second layer to our automated workflow let's create an even larger automated workflow to include automatically moving a lead, sending an email, and changing lead status.