Schedule a follow-up activity after a lead enters a specific step
Automate sales follow-ups to manage a larger number of leads in a day and stay on top of all of them. Once leads enter a step in your pipeline, automatically schedule the next action you need to take after a set delay.
You may automate this process in noCRM using Zapier or Make (formerly Integromat) an automation platform that allows you to automate workflows between different apps based on a pre-set event that triggers one or a series of actions.
noCRM.io is a lead management tool that focuses on the sales process helping salespeople from the moment they create a cold prospect until it converts to a paying customer
In this guide, you're going to learn how to automatically set a proposal activity scheduled five days after a lead enters the Meeting step in the Premium pipeline in noCRM.
💡 This is a simple scheduling workflow. If you want to build a more complex one that allows you to assign a lead, send an email, move it to the next step, then set it on StandBy for follow-ups, then please read this tutorial
Variables that you can customize:
- Sales activity
- Number of days
- Pipeline step
- Pipeline
Get started
Build this automation with Zapier
Now let's do the same thing using Zapier!
Create your Trigger
- Sign into your Zapier account and create a Zap by clicking on the "Create Zap" button on the top-left corner of the page
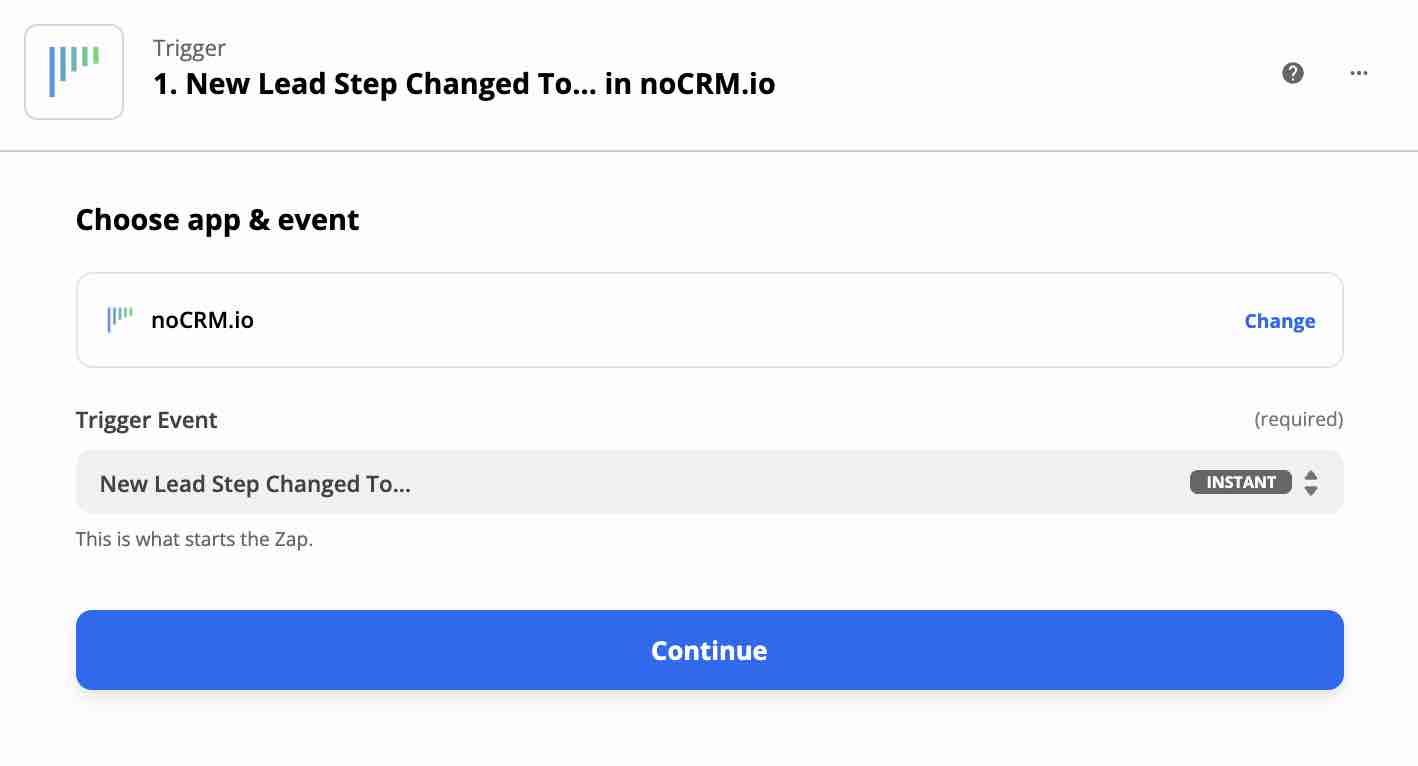
- Select the noCRM.io app as the App Event and choose the Trigger Event "*New Lead Step Changed to... *"
Connect your noCRM account
- Enter your account name (
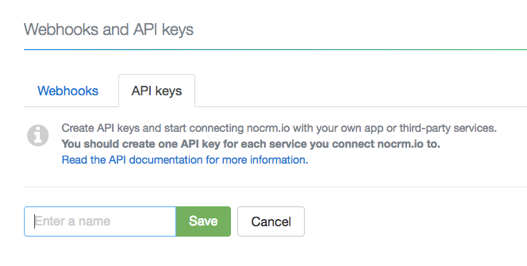
https://AccountName.nocrm.io) - Enter your API Key. To find your API key, go to your noCRM account > Admin Panel > Integrations > API > API Keys then click on the Create an API Key button and name it.
- Choose the step event name. In this case, it's "Meeting".
Create your Action
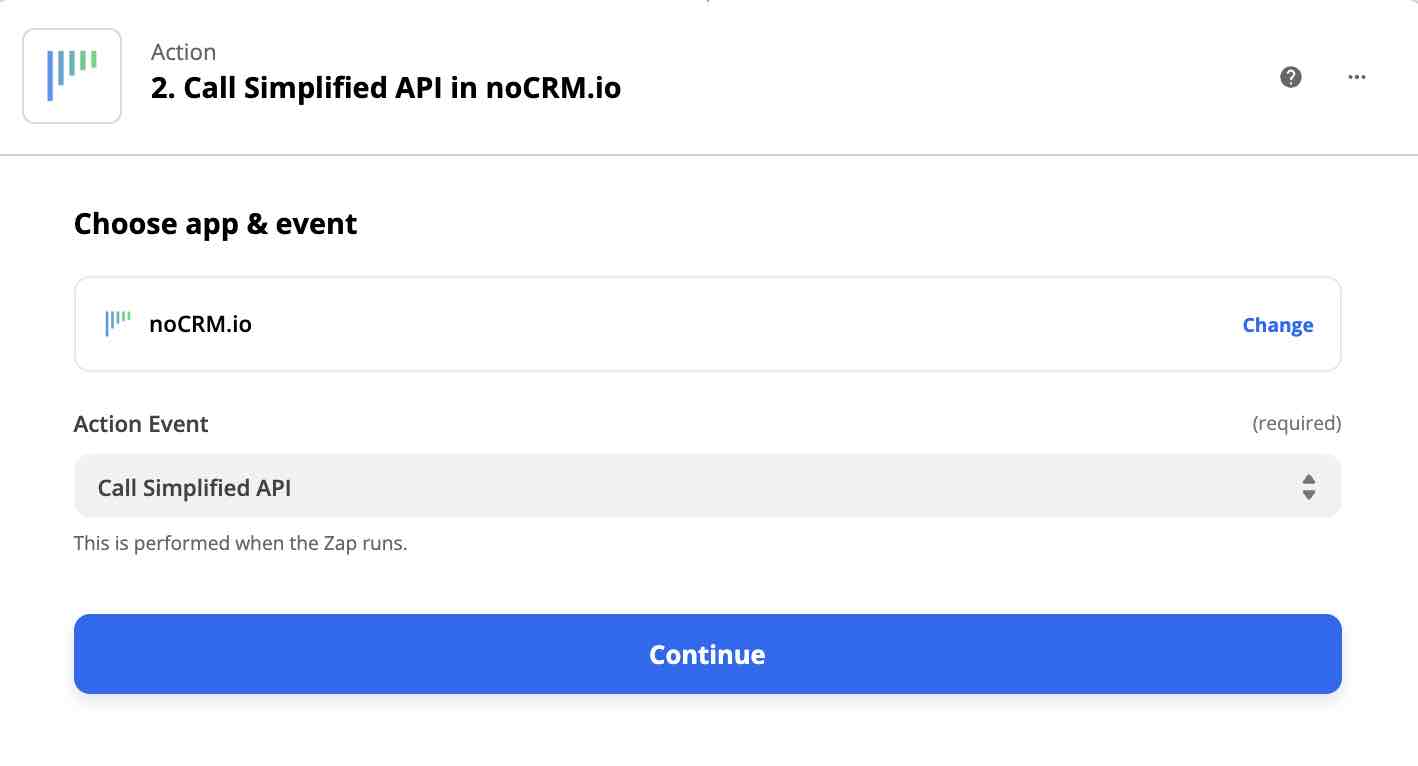
- Select the noCRM.io app as App Event and pick the Action Event "Call Simplified API"
- Choose the noCRM account you set up already
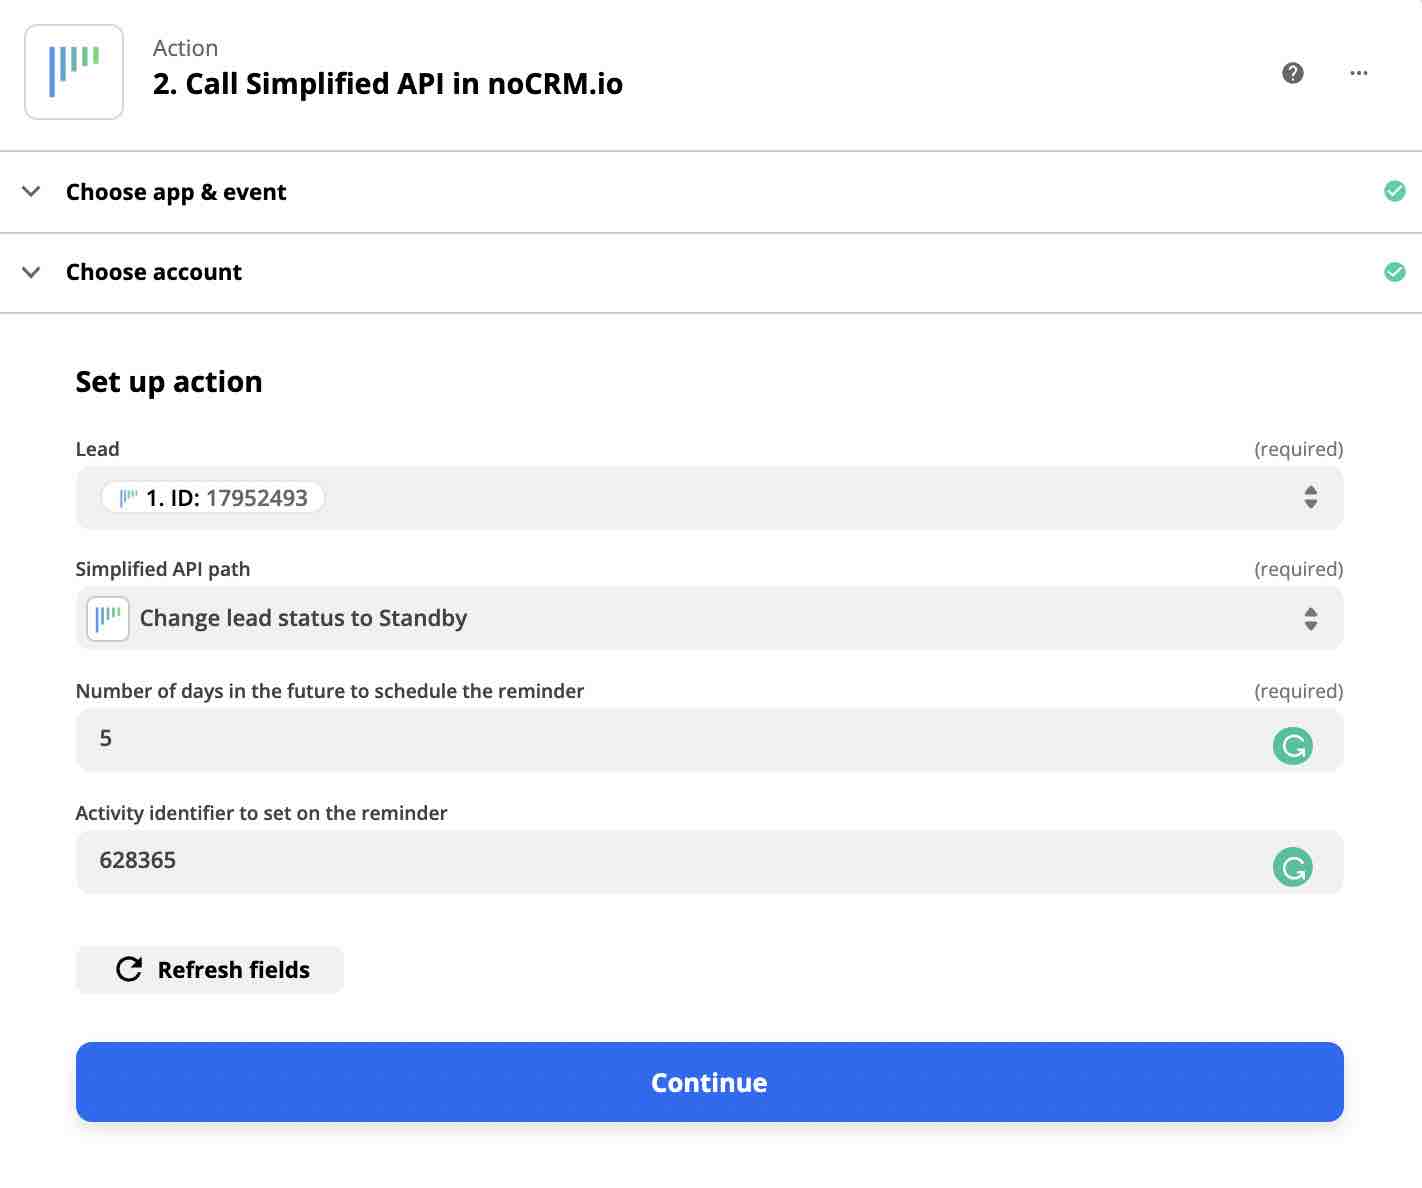
Set up your Action
- Set up your lead by choosing the Custom tab and finding the ID of the lead generated from the trigger.
- Choose "Change lead status to Standby" as your Simplified API path. After a couple of seconds, two more fields will appear:
I. In the first field, enter the number of days in the future you'd like to schedule the reminder for
II. Enter the ID of the activity you want to schedule
Note: To find the Activity ID, go to Admin Panel > Integrations > API > Account Object IDs.
You've successfully completed automating this simple yet efficient process with Zapier.
Build this automation with Make
Create your Trigger
- Sign into your Make account and create a new scenario in the Scenarios section
- Select the noCRM.io as the first module and pick the trigger "Watch Lead Step Changed"
Click on the Add button next to the 'Connections' field:
I. In the Connection name field, enter a name for the connection.
II. In the Subdomain field, enter your account domain name. For example, if your account's URL address is https://AccountName.nocrm.io/ then your subdomain is AccountName.
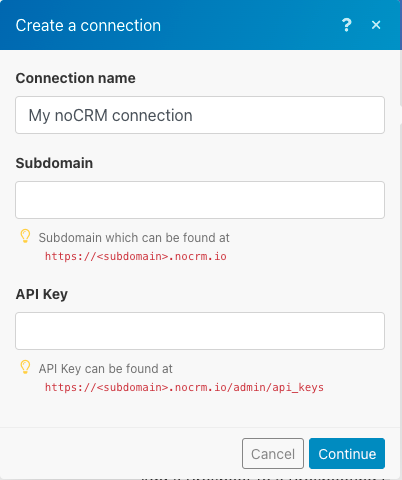
III. Retrieve your API Key: go to your Admin Panel > Integrations > API > API Keys > create a new key and copy it and click continue.
Create your Action
- Select the noCRM.io as the second module and pick the action "Make an API Call"
- Choose the connection you set up already
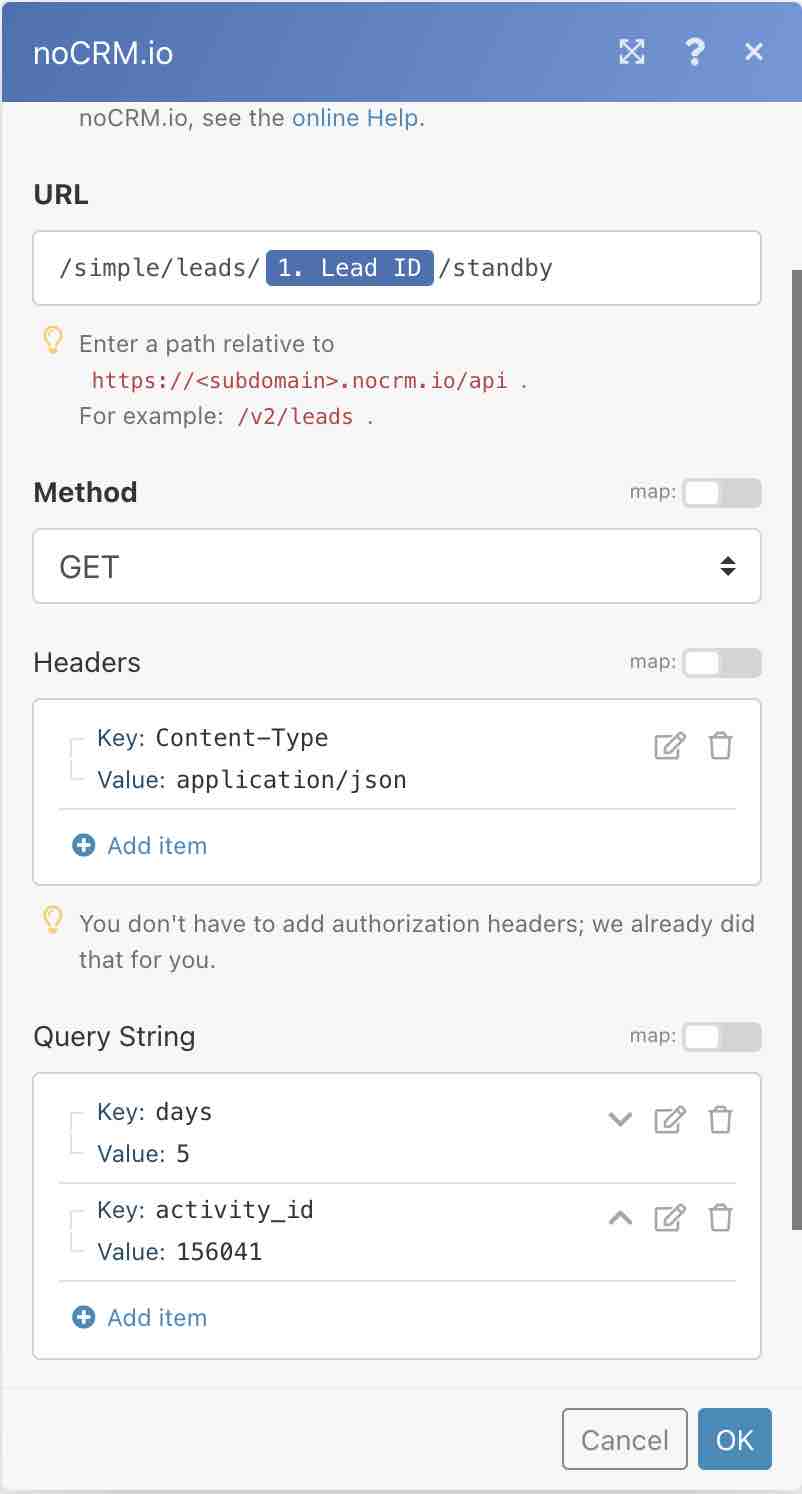
1| Next up, enter the following URL field:
/simple/leads/{LeadId}/standby&activityid
Note: do not copy and paste '{LeadId}'. Instead, choose 'LeadID' from the first module.
2| Choose the method "GET" and scroll down to Query String and add two Items.
I. Set up the first item with:
Key: days
Value: 5 (this represents how many days in the future you’d like to schedule this activity)
II. Define the second item with:
Key: activity_id
Value: paste in the ID of the activity you’d like to schedule. Find the activity ID in Admin Panel > Integrations > API > Account Object IDs.
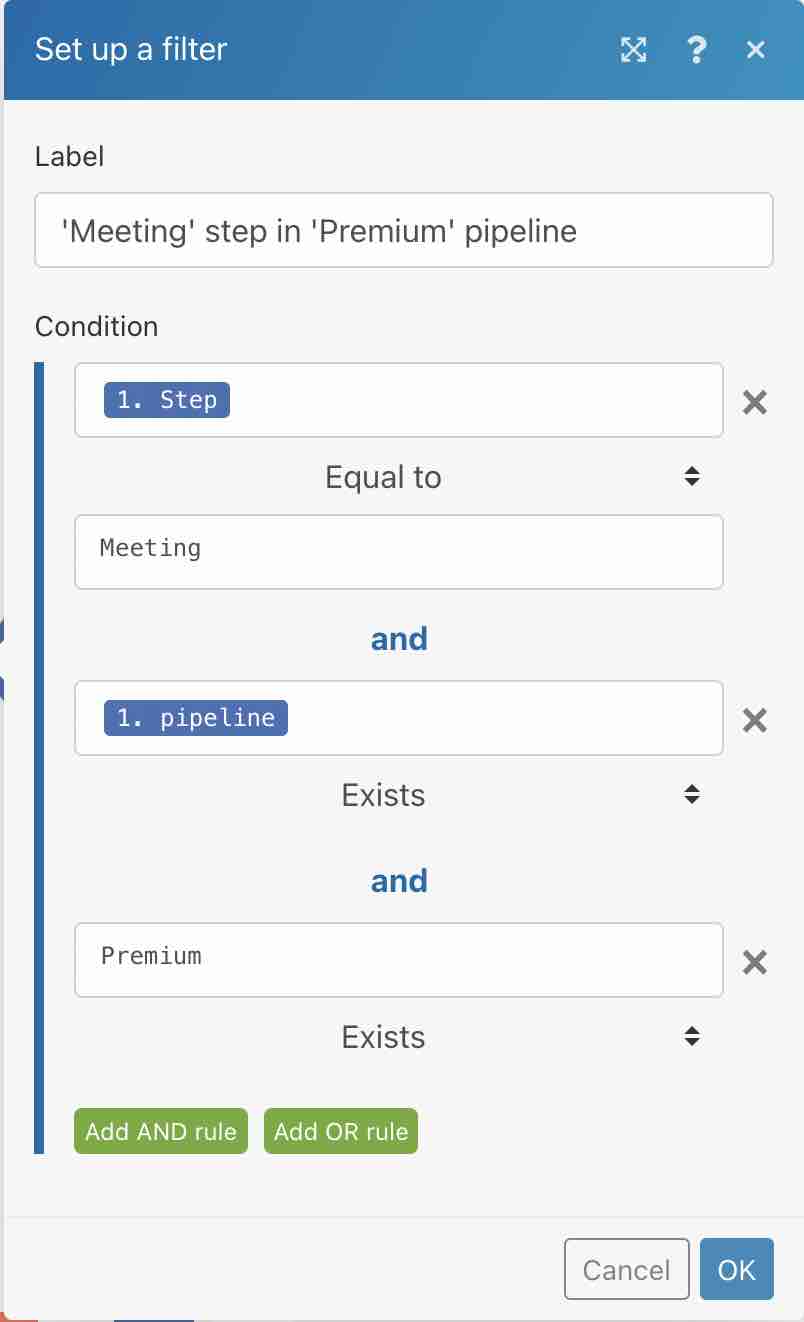
Create your Filter
- Click on the three dots between the two modules created and select “Set up a filter”

- Fill in the condition field with the noCRM “Step” taken from the noCRM.io module. For the value field under the text operator “Equal to”, type in the name of your chosen step, in this case, it's "Meeting".
Note: In case you have more than one pipeline with the same step name, add another condition with the “pipeline” taken from the noCRM.io module and enter the name of the correct pipeline in the text operator “Equal to”.
Your scenario is now ready to run!